DIY Faux Brick Walls in the Gym Shed: A Simple Guide to Transform Your Workout Space

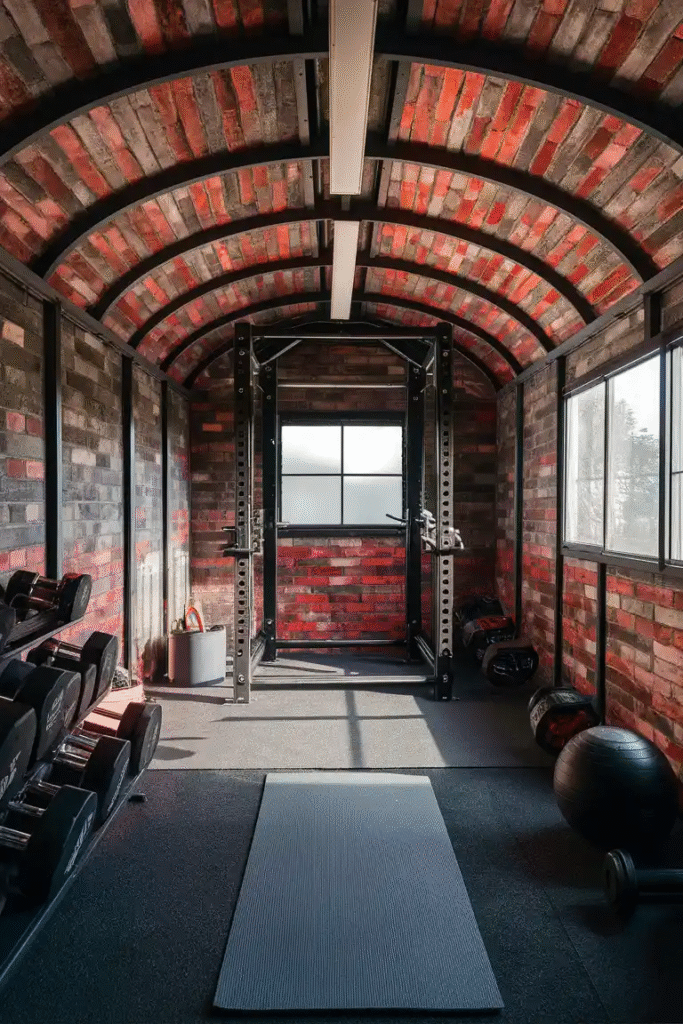
Setting up a gym in a shed or any outdoor structure offers a perfect solution for those looking to create a private and functional workout space. However, turning your shed into a gym requires more than just gym equipment. You need to ensure the environment is comfortable and motivating. One of the best ways to transform your shed gym is by installing DIY Faux Brick Walls in the Gym Shed. Faux brick is not only stylish and timeless, but it’s also a cost-effective and easy way to upgrade your gym shed.
In this post, we will guide you through the process of creating DIY faux brick walls in your gym shed. From choosing the right materials to installation tips, you’ll learn how to enhance your workout environment with minimal effort.
Why Choose Faux Brick Walls for Your Gym Shed?
Before diving into the DIY faux brick walls in the gym shed project, let’s talk about why faux brick is the ideal choice for your workout space. Faux brick offers several advantages:
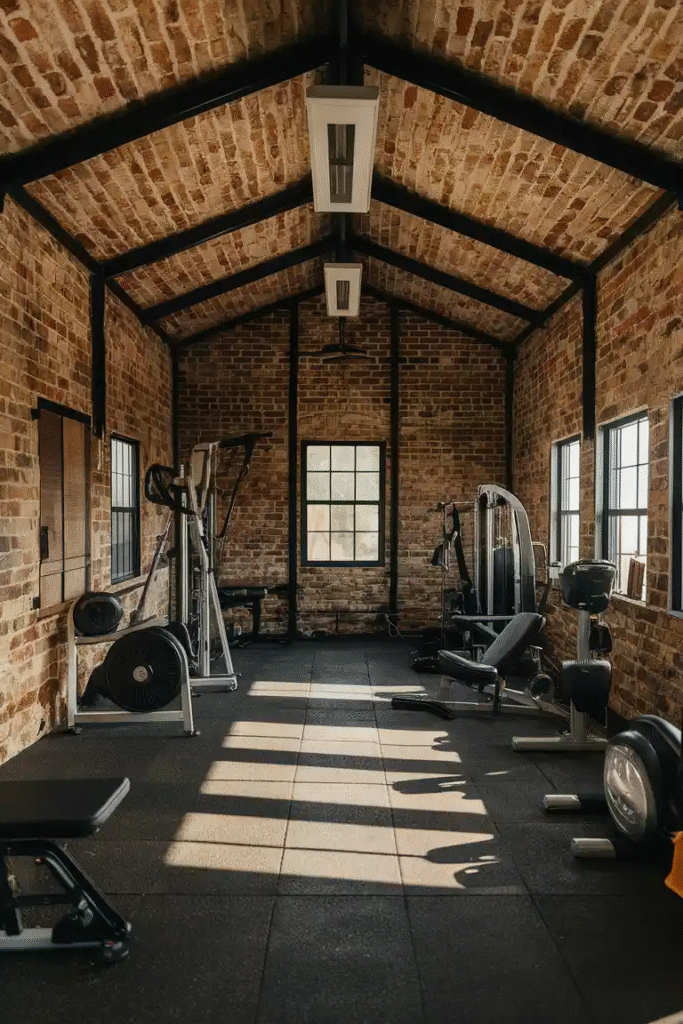
- Aesthetic Appeal: The rustic, industrial charm of brick can give your gym shed a unique and professional look. It can help you create an inspiring atmosphere that motivates you to work harder.
- Cost-Effective: Real brick can be expensive to install, especially in an area like a shed. Faux brick offers a similar look at a fraction of the price, without compromising on style or durability.
- Easy Installation: Installing faux brick is straightforward, especially for DIY enthusiasts. With the right materials and tools, you can transform your gym shed in just a few hours.
- Durability: Faux brick is made from materials like polyurethane or polystyrene, which are resistant to moisture and can withstand the wear and tear of a gym environment. You won’t have to worry about the material getting damaged by sweat or humidity.
Materials Needed for DIY Faux Brick Walls in the Gym Shed
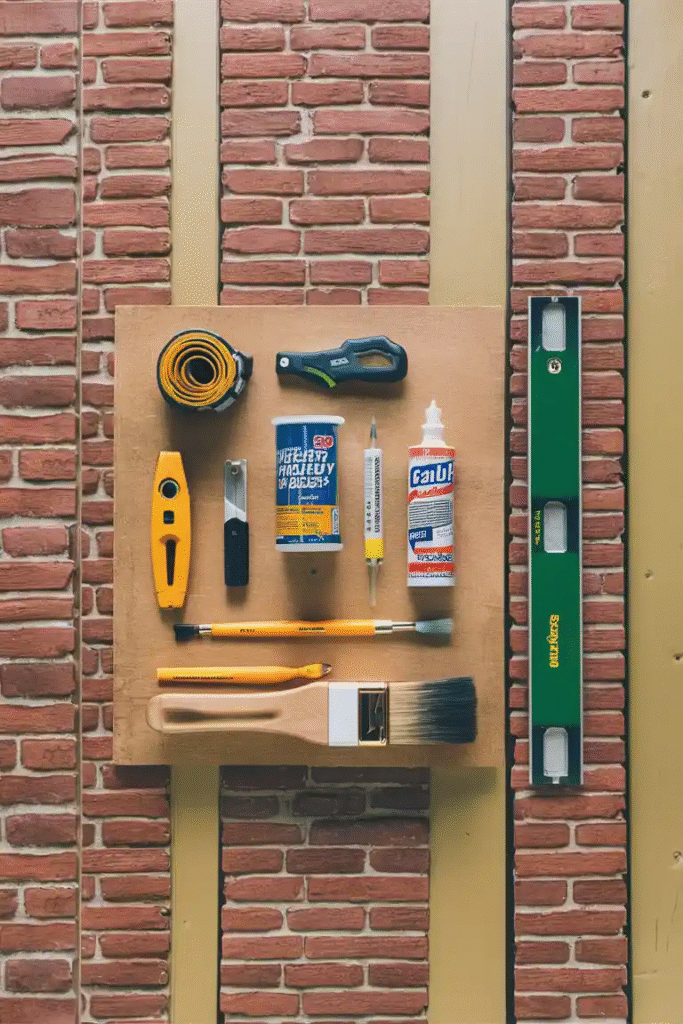
To get started with your DIY faux brick walls in the gym shed, you’ll need the following materials:
- Faux Brick Panels or Tiles: These come in various textures and colors. You can choose from pre-painted panels or unpainted ones that you can customize with your paint.
- Measuring Tape: To ensure your faux brick panels fit perfectly on the walls of your gym shed, you’ll need a measuring tape to take accurate measurements.
- Utility Knife or Saw: Depending on the material, you may need a utility knife to cut through thin faux brick panels, or a saw for thicker ones.
- Construction Adhesive: Use a strong adhesive to bond the faux brick to the walls of your shed. This will ensure that the panels stay in place.
- Paint (optional): If you’re using unpainted faux brick tiles, you can customize the color and finish by painting them with a suitable wall paint.
- Level: To ensure the faux brick panels are aligned properly, a level will help keep everything straight and even.
- Caulk or Grout (optional): If you want to fill in any gaps between the faux bricks to make the walls look more realistic, caulk or grout will help achieve this effect.
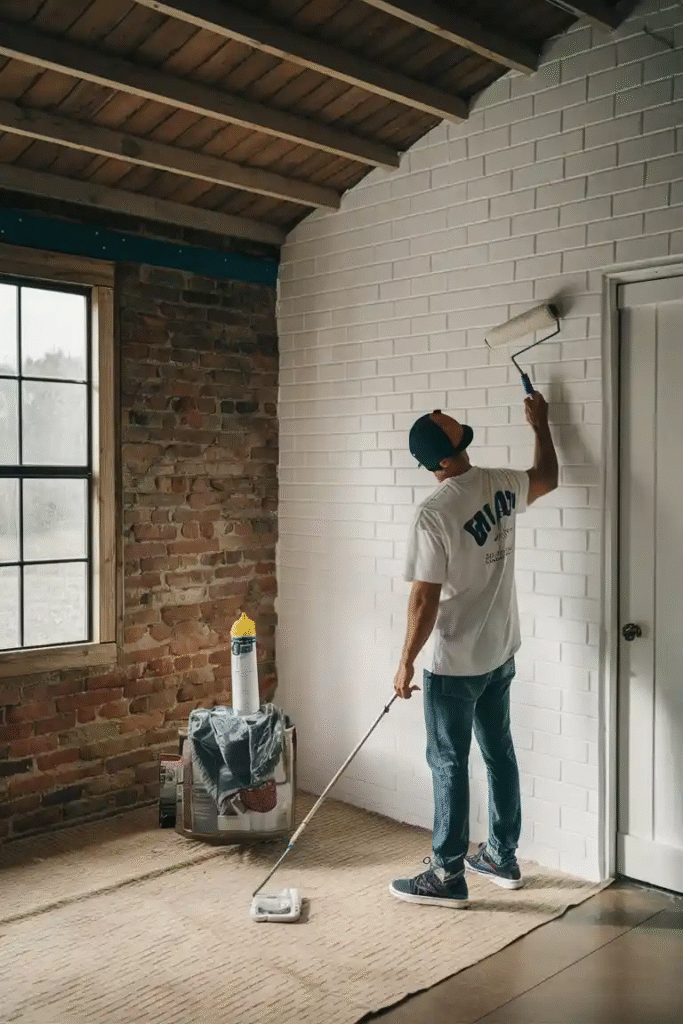
Steps for Installing DIY Faux Brick Walls in the Gym Shed
Follow these simple steps to create your DIY faux brick walls in the gym shed:
1. Measure and Plan Your Layout
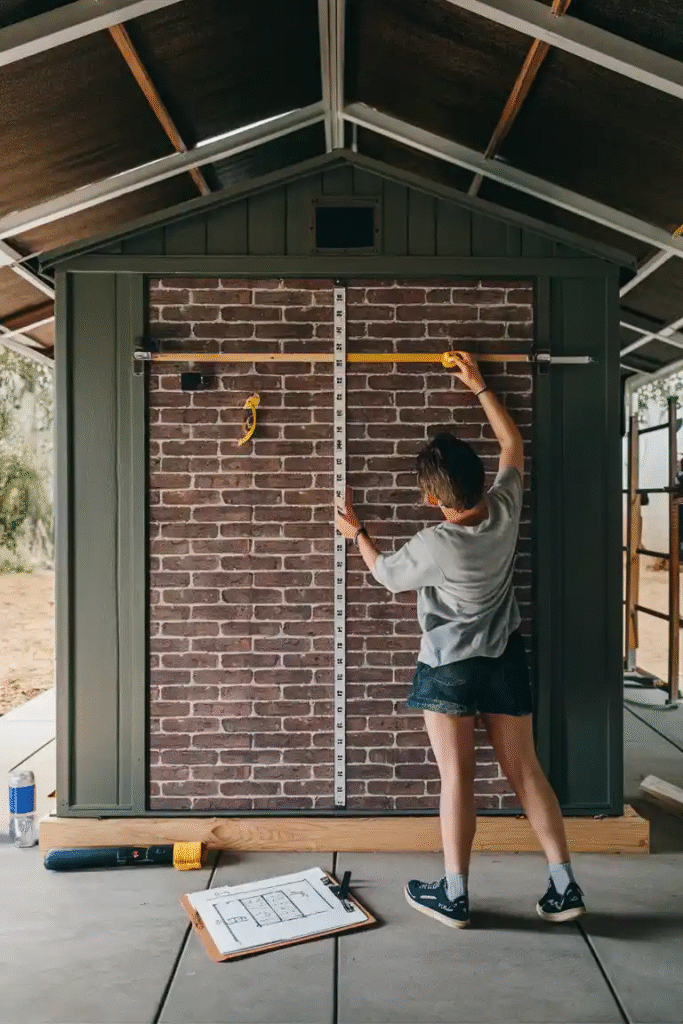
The first step in your faux brick wall project is measuring the walls of your gym shed. Use the measuring tape to determine the width and height of each wall. This will help you figure out how many faux brick panels or tiles you will need.
Once you have your measurements, plan out the layout of the faux bricks. Consider whether you want to create a brick pattern or a more modern stacked design. Draw a rough sketch of how the bricks will fit on the wall, including any cuts you may need to make.
2. Prepare the Walls
Before installing the faux brick, it’s essential to prepare the surface. Clean the walls of your gym shed thoroughly to remove dirt, dust, or grease. If the walls are painted or coated with any finish, consider sanding them lightly to ensure a better adhesive bond.
3. Cut the Faux Bricks to Fit
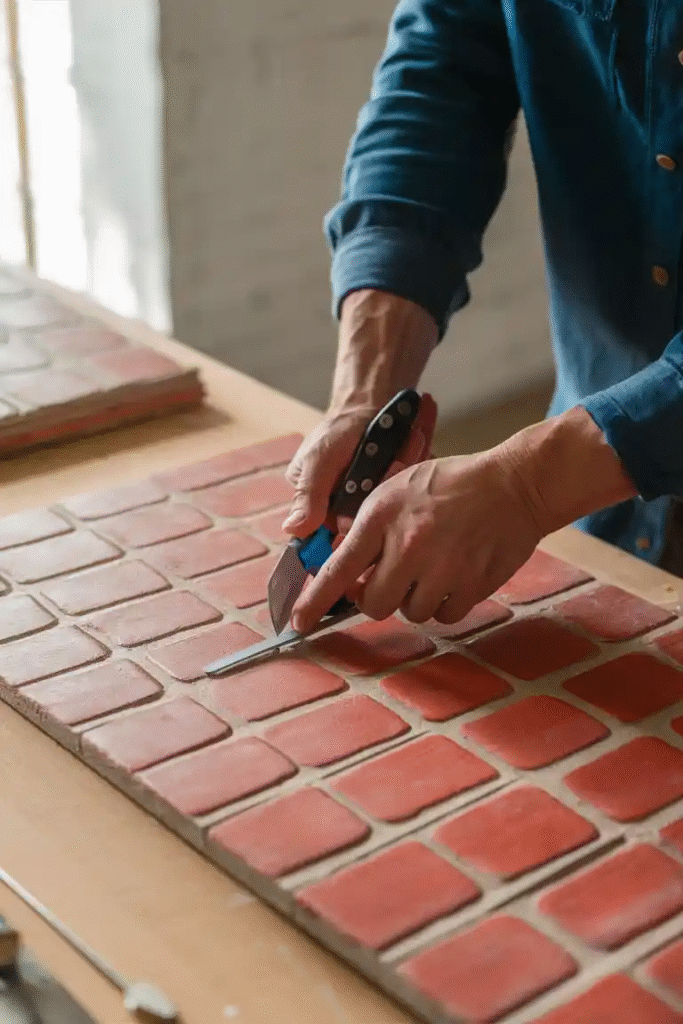
If you’re using faux brick panels or tiles that need to be cut, now is the time to do so. Use the utility knife or saw to trim the panels to the correct size based on your measurements. Take your time to ensure the cuts are straight and clean for a polished look once installed.
4. Apply Adhesive to the Wall or Panels
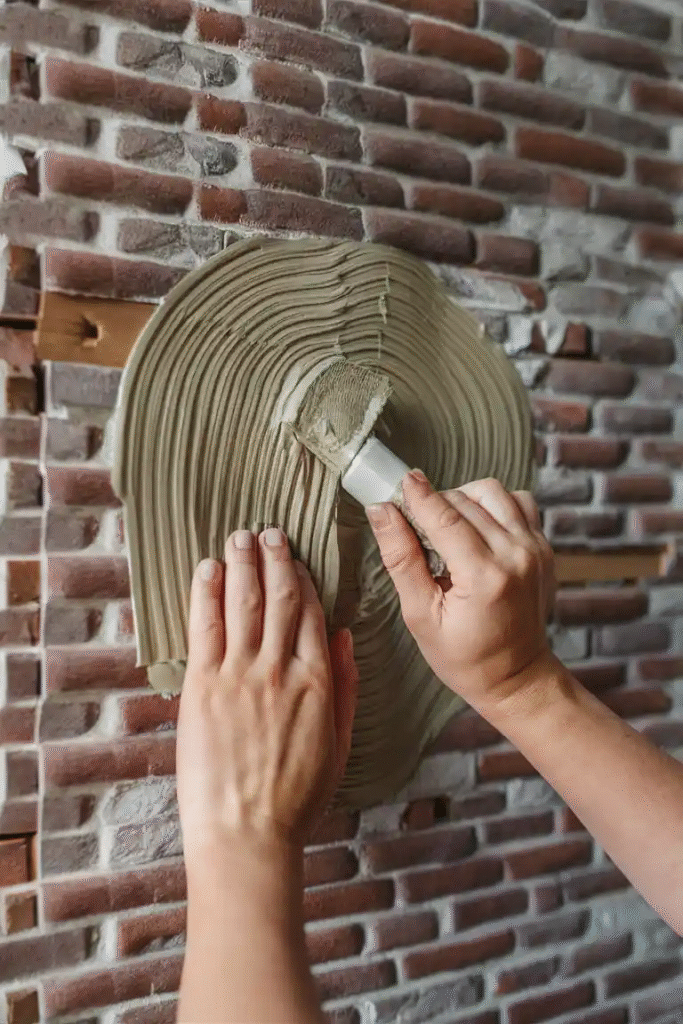
Once the panels are cut, apply a generous amount of construction adhesive to the back of each faux brick panel or tile. Be sure to follow the manufacturer’s instructions for the adhesive to ensure it bonds well to the surface.
You can also apply adhesive directly to the wall if needed. Just be sure that the adhesive is spread evenly to avoid any gaps or lifting.
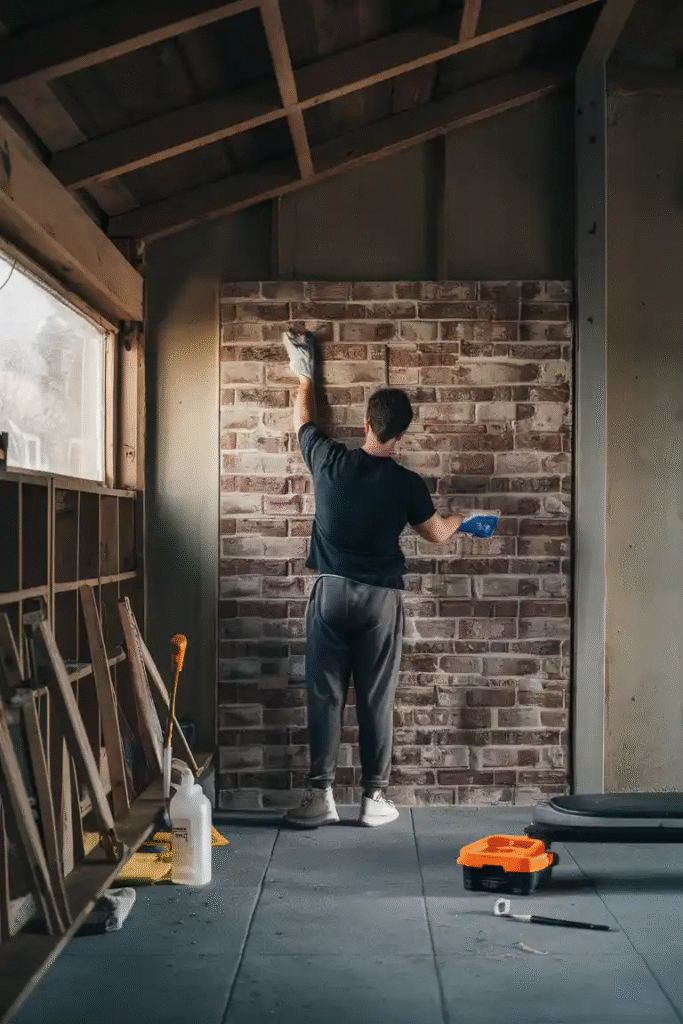
5. Install the Faux Bricks
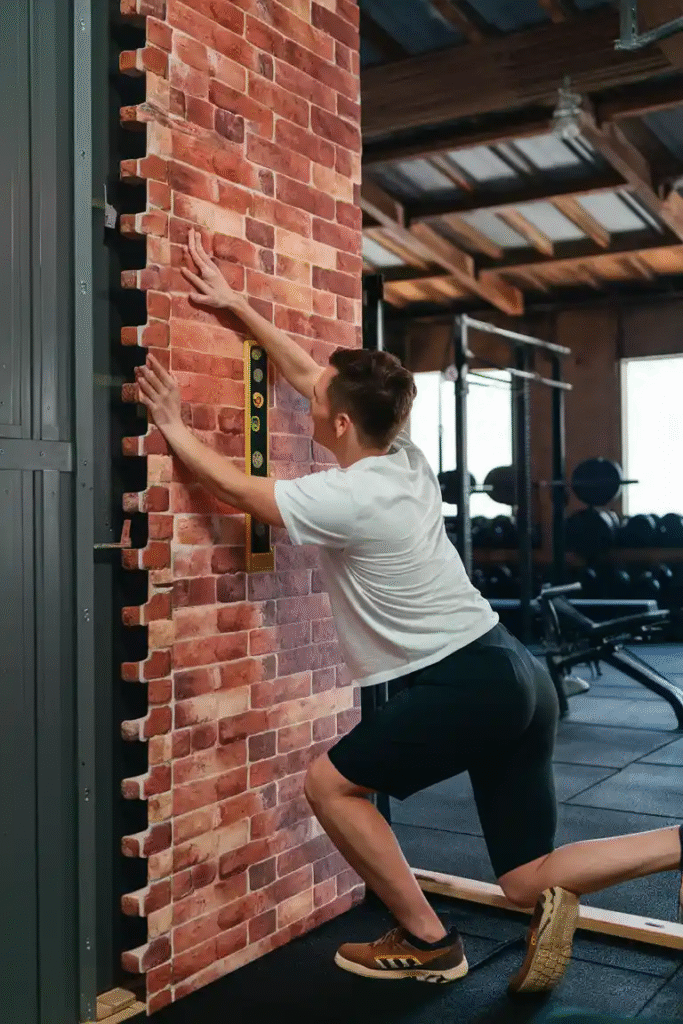
Now it’s time to start sticking the faux bricks to the walls. Press each panel firmly against the wall, making sure to align it with your planned layout. Use the level to check that each panel is straight and even. Work your way across the wall, ensuring the edges of each panel meet neatly.
For a more realistic look, you can use grout or caulk to fill in the gaps between the faux bricks. This will mimic the look of real brick and provide a seamless appearance.
6. Paint (Optional)
If you opted for unpainted faux brick tiles, now is the time to add some color. Choose a color that matches your gym’s aesthetic and apply a coat of paint to the faux bricks. You can even go a step further by using a distressed finish to give your wall a more vintage or rustic appearance.
7. Let Everything Set
Allow the adhesive to fully cure before you start using your gym shed. This typically takes 24 to 48 hours, depending on the type of adhesive you used.
Benefits of Faux Brick Walls in Your Gym Shed
Installing DIY faux brick walls in the gym shed provides several key benefits:
- Visual Appeal: Faux brick walls add a unique and industrial touch to your gym. The aesthetic change is often enough to make your space feel completely new, motivating you to use it more often.
- Low Maintenance: Faux brick is much easier to maintain than real brick. It doesn’t need regular cleaning or sealing, and it is resistant to moisture and humidity, making it perfect for a gym shed.
- Sound Dampening: The texture of the faux brick can help reduce the noise inside your gym shed. This is particularly useful if you have equipment that makes a lot of noise or if you live in a neighborhood where noise might be a concern.
- Affordability: Faux brick is generally more affordable than traditional brick, making it an ideal choice for those on a budget.
Conclusion
Transforming your gym shed with DIY faux brick walls is a simple and affordable way to enhance your workout space. By following these easy steps, you can give your shed a stylish, modern look that will motivate you to get the most out of your workouts. Whether you’re a DIY novice or a seasoned pro, installing faux brick walls is a fun and rewarding project that will pay off every time you step into your gym. So, grab your materials, roll up your sleeves, and start creating the ultimate gym space in your shed!